Hydraulic Hose Assembly Orientation
For double elbow assemblies, it is critical for the orientation to be described how the two ends relate to each other. If the hose assembly is made and the orientation is not taken into account, the hose assembly will more than likely be difficult to install.
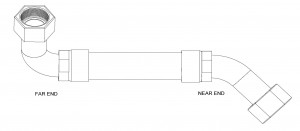
Look at the example below. There is a 90º hose end on one end of the hose and a 45º hose end on the other end of the hose.

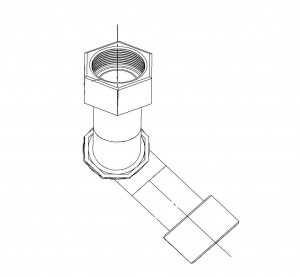
Either end can be selected as the reference point. For this example, the 45º hose end is going to be the reference point. Position the reference point nearest you. Rotate that end straight up, like the large hand on a clock pointing at the 12. See the picture below.

Now, as if you were looking at a clock, describe where the other end points as if it is the small hand on a clock. The example above would be at 5:00.
The description would be the 45º End is the reference point (or at 12) and the 90º is at 5:00.


